Sewing A Special Occasion Tulle Dress
Blogger: Deanna Mackin
How to Sew a Special Occasion Tulle Dress
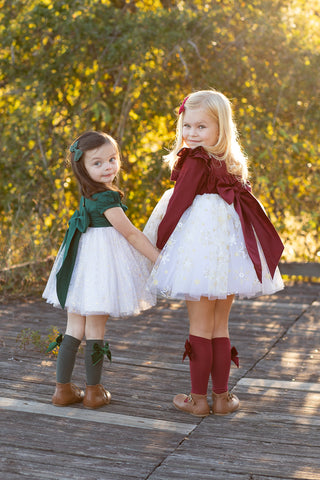
Adding tulle to a simple dress can transform it into something magical - a dress that's perfect for birthdays, dress up, and special occasions.
Just like when working with any other new fabric, tulle also has a learning curve. However, with some instruction and helpful tulle tips, you can easily take your sews to the next level in time for some holiday magic!
Before you get started, here are a few things to remember when working with tulle:
-Tulle does not fray and does not need to be hemmed
-Use clips instead of pins
-Use a needle designed for lightweight fabrics when gathering tulle (size 80/11 used in this tutorial)
-Use pattern weights to keep tulle from shifting while cutting
-Tulle varies in type, quality, and price- avoid inexpensive polyester tulle made specifically for crafting purposes
-Use a slightly different color thread in the bobbin when sewing gathering stitches on the tulle to ensure the correct gathering thread (bobbin) is being pulled to gather
Simple Tulle Overlay
A simple tulle overlay consists of 1-3 layers of tulle on top of a skirt lining. This method is beginner friendly and a great way to get introduced to sewing and gathering tulle. It offers a slimmer skirt that can beautifully showcase printed and embellished tulle designs. The following instructions can be used for patterns that call for woven or knit fabrics, with or without a placket. The Roanoke tulle dress featured was made using 1 yard of soft nylon gold splatter print tulle from Tulletastic and 1 yard of Casa nylon tulle from Joann fabric.
Start by constructing and hemming the skirt lining using the normal skirt measurements and instructions provided in the chosen pattern, do not gather at this time. The skirt lining can be made of lightweight cotton woven (shown) or a poly lining material. On the wrong side of the skirt lining, find the middle of the back skirt piece and mark the lines for the placket as instructed in the pattern.
Measure the length of the hemmed skirt. Each tulle layer will be cut 1/2” (1.3 cm) longer than the hemmed skirt length. The width of the tulle will be cut 1.5-2 times the width of the underskirt depending on the amount of volume desired. Alternatively, the full width of fabric (WOF) can be used if using wide 58-60” tulle to omit the need to measure. My size 4 length Roanoke skirt measured 12.75” once hemmed. I cut 2 pieces (front and back) for 2 layers of tulle that measured 13.25” (33.5 cm) in length and 60” (152.5 cm) in width (4 tulle pieces total).
Once the pieces are cut, place two tulle skirt pieces right sides together and sew the side seams using a 1/2” (1.3 cm) seam allowance. Repeat for each tulle later. Sew a gathering stitch along the top edge of each tulle skirt layer using a 3/8” (1 cm) seam allowance. Gather each layer the same width as the skirt lining and clip in place.

If a placket is needed, find the skirt lining back middle and leave 1” (2.5 cm) on either side of it ungathered. Baste each tulle layer onto the skirt separately using a 1/4” (0.6 cm) seam allowance.
With the wrong side of the skirt lining facing up, sew a basting stitch along the outside lines of the placket (1/4” (0.6 cm) away from the center line). This will hold all the tulle in place while cutting and creating the placket. Cut down the length of the straight middle line, as well as each diagonal line creating a “w.” Continue sewing the placket using the steps provided in the pattern.
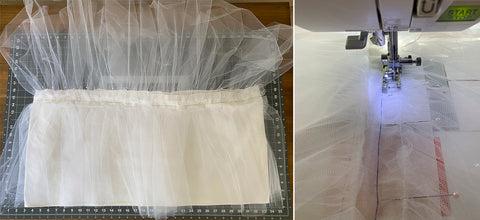
Sew two rows of gathering stitches through all the skirt layers- one at 3/8” (1 cm) and one at 5/8” (1.6 cm) from the top edge of the skirt. Do not gather the placket. Alternatively, consider doing the zig zag method which can be helpful when sewing through multiple layers of fabric to ensure gathering stitches do not break when gathering.
For the zig zag method, cut a long piece of fishing line, floss, or thick thread. The tutorial photos show this method using a small piece of fabric but the same concept applies to the full skirt. Line up the raw edge of the skirt top approximately 1/4” (0.6 cm) away from the needle. Place the line directly underneath the middle of the presser foot. Using a wide zig zag stitch, sew back and forth over the line around the entire circumference of the skirt, leaving 2-3” (5- 7.6 cm) of extra line at the beginning and end of the stitching. To gather, simply pull on the line and gather the fabric. Attach the skirt to the bodice, making sure that the entire zig zag stitch and line all ends up within the seam allowance. Pull and remove the line when finished.

If the traditional gathering method was used, gather the skirt to the same width as the bodice. Attach the skirt to the bodice as usual. Remove the visible gathering stitch and the dress is now complete.

Deluxe Tulle Skirt
A full body tulle skirt uses wider cuts of tulle with multiple layers to create a voluminous and extravagant skirt. The following instructions can be used for woven dress patterns that do not call for a placket. There will be a total of 5 skirt layers: 1 skirt lining, 2 tulle layers attached to the lining, and 2 tulle layers attached to the bodice. The Mavora tulle dress featured was made using 4 yards of nylon gold glitter snowflake tulle from Tulletastic, 4 yards of Casa nylon tulle as well as 8 yards of standard matte nylon tulle from Joann fabric.
To start, calculate the measurements for each tulle skirt layer. Construct and hem the skirt lining using the measurements and instructions provided in the chosen pattern, do not gather at this time. The skirt lining can be made of lightweight cotton (shown) or a poly lining material. Measure the length of the hemmed skirt lining. My size 6 mini length Mavora measured 15” (38 cm) hemmed. The tulle skirt lengths will be as follows:
Layer 1: Hemmed skirt lining length + 1” (Ex: 16”)
Layer 2: Hemmed skirt lining length + 1” (Ex: 16”)
Layer 3: Hemmed skirt lining length (Ex: 15”)
Layer 4: Hemmed skirt lining length -1” (Ex: 14”)
The skirt widths will be cut 3-4 times the width of the skirt provided in the cut chart of the chosen pattern. For example, the size 5 width Mavora calls for 2 skirt pieces 30” wide each. I multiplied this number by 4 and used 120” (305 cm) as my new skirt width. For each layer, cut 2 pieces each using the new length and width calculated.
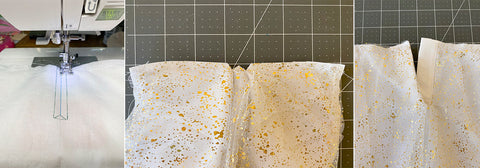
When cutting very wide pieces of tulle, it can be helpful to fold the fabric and cut it all at once to ensure a straight and even edge while also saving time. To do this, start by either using a cardboard fabric bolt or making your own. Cut out a piece of cardboard approximately 6” (15 cm) in width and long enough to fit the tulle fabric folded in half. Take the raw edge of the tulle and square it off using a cutting ruler and rotary cutter to make sure there is a straight and clean edge.

Place the edge of the tulle underneath the cardboard with 4-5” (10-12.5 cm) off to the side. Fold this excess tulle up and over the cardboard. Flip/roll the cardboard over. Continue flipping it over until all of the tulle is on the bolt. Slide the cardboard out from the middle of the tulle. Cut off 2-3” (5-7.5 cm) from the top edge of the tulle to create a straight edge. Measure the length of tulle needed and cut through all the tulle layers with a rotary cutter. Open up the tulle to measure and cut the width to the size needed.

Start with tulle layer 1, the layer that will be visible on the outside of the dress. Take the two tulle skirt pieces and place them right sides together. Sew the side seams using a 1/2” (1.3 cm) seam allowance. Sew a gathering stitch around the top edge of the skirt using a 3/8” (1 cm) seam allowance. Consider breaking up the skirt into 2 or 4 equal parts and sewing gathering stitches in sections to make it more manageable. Gather the skirt to the same width as the bodice and clip in place, right sides together.

Baste the skirt onto the bodice using a 3/8” (1 cm) seam allowance. At this time, flip the dress right side out to inspect the tulle. To fix any bunching or puckering of tulle, rip stitches out and readjust tulle. Re-sew the portions needed until the tulle lays nicely around the entire bodice. Repeat these steps for tulle layer 2.

Take the under skirt. With a marking tool, draw a straight line 1.5” (3.9 cm) down from the top, raw edge of the skirt, all the way around the skirt front and back. Draw a second line 2.5” (6.5 cm) down from the top raw edge of the skirt.

Take the two tulle pieces for tulle layer 4, place right sides together and sew the side seams using 1/2” (1.3 cm) seam allowance. Sew a gathering stitch around the top edge of the tulle skirt using a 1/2” (1.3 cm) seam allowance. Gather the tulle skirt to the same width as the skirt lining. Place the right side of the tulle onto the right side of the skirt lining with the top edge of the tulle being upside down. Align the top edge of the tulle skirt to the second line drawn on the skirt lining. Use pins to secure the tulle skirt to the skirt lining. Sew to attach with a 1/2” (1.3 cm) seam allowance, sewing directly over the previous gathering stitch. Flip the tulle down and over the stitch so the right side is facing up.


Repeat all of these steps with tulle layer 3, using the first line drawn on the skirt lining.
Sew two rows of gathering stitches on the skirt lining, one at 3/8” (1 cm) and the other at 5/8” (1.9 cm) seam allowance. The gathering stitches will only be going through the lining fabric, no tulle will be gathered at this point as all tulle attached to the skirt lining should be flipped down and out of the way. Gather the skirt lining to the same width as the bodice and clip in place. Sew to attach the skirt lining and additional tulle layers together all at once using a 1/2” (1.3 cm) seam allowance. A heavy-duty needle can be helpful at this point when sewing through so many layers of fabric.

Finish the skirt seam with a serger or zig zag stitch, but do not topstitch to the bodice due to the bulk of the seam.

