Tutorial: Chevron Sheridan

Blogger: Annie Lomeli
Chevron Sheridan
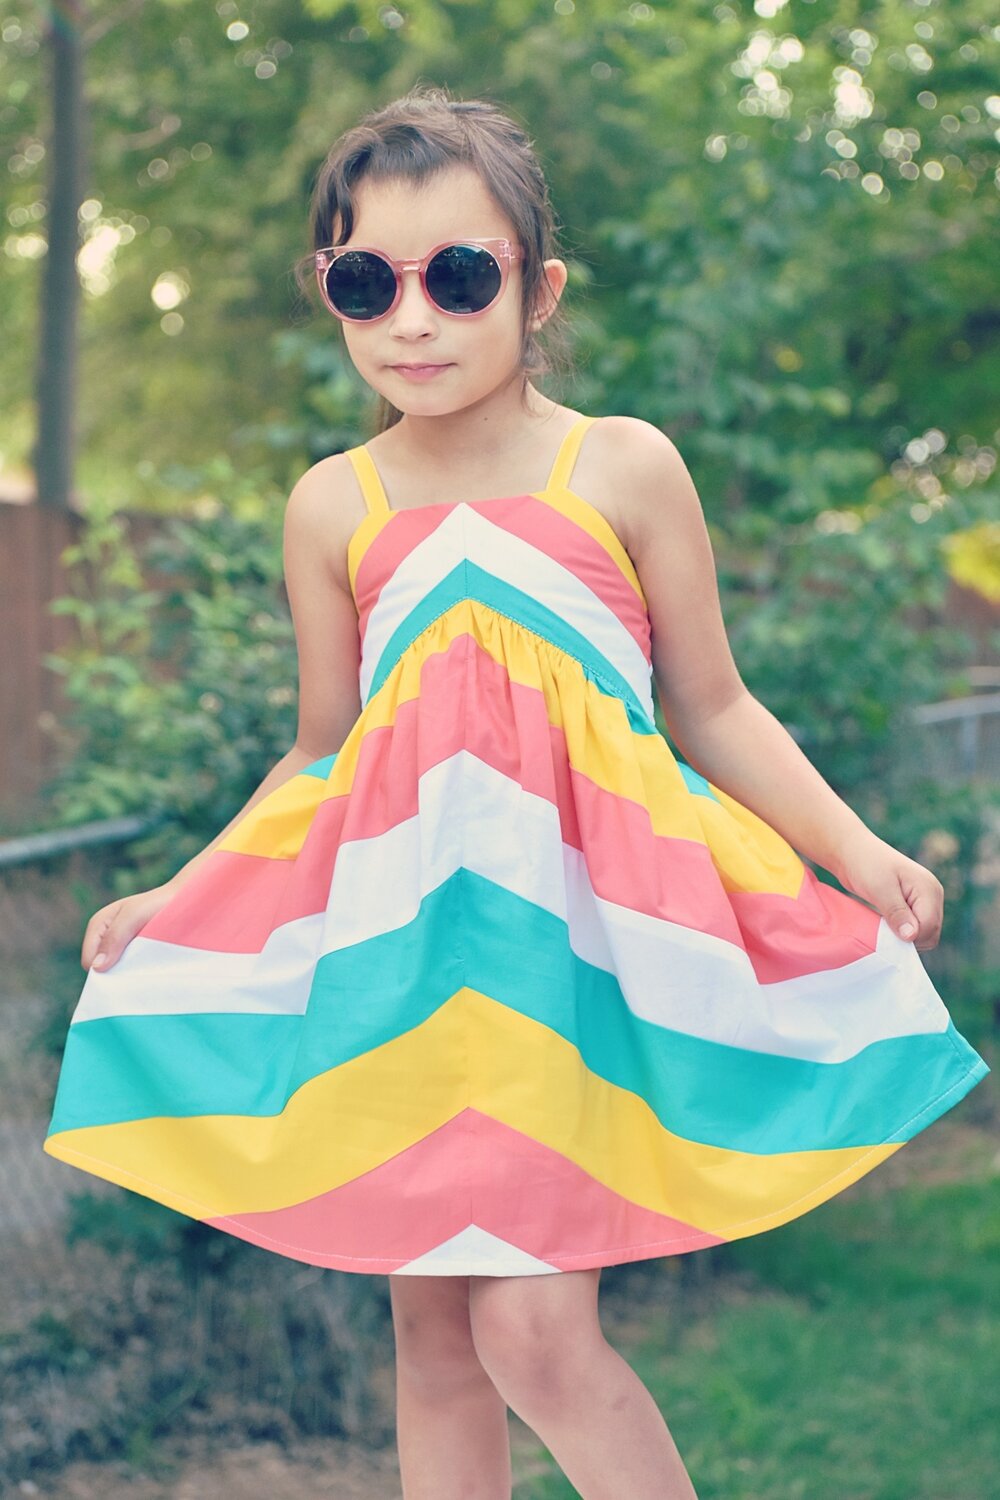
When I saw Sheridan, I was immediately drawn to the chevron bodice option. I am a sucker for stripes in all varieties, and this is the perfect pattern to make all my stripe matching dreams come true! I love the idea of creating your own chevron pattern on the bodice per the pattern, but I wanted that pattern to continue onto the skirt. In this tutorial, I will show you how to make your own chevron skirt pattern to use with the unique Sheridan bodice.
Start by printing and putting your pattern together. Cut out all of your pattern pieces with the exception of the skirt pieces. Follow the Sheridan tutorial to construct the bodice, stopping at page 33.

Drafting the Chevron Skirt Pattern
Gather supplies. You will need a pencil or pen, a ruler, a tracing wheel (not completely necessary but helpful), a rotary cutter or scissors, a cutting mat and blank paper. I keep a roll of white Kraft paper on hand to use for drafting new patterns or modifying existing patterns. If you don’t have access to large paper, simply tape or glue regular paper together as you would the pattern.

Trace the skirt pattern piece onto a blank piece of paper.

Add a ½” seam allowance line on the longest vertical edge, and then extend the top and bottom lines to meet the new edge.

Cut out the new pattern piece.

Next, figure out the angle and the height you want for the chevron. My cutting mat has lots of angled lines, so I chose to go with a 30° angle, but you can choose any angle. For a more dramatic look, go with 45°.
I started by marking the pattern piece 1 ½” down from the top as I want the length of the first chevron to be finished at approximately 1” at the top. Seam allowance will be added to the bottom, but the top already has a ½” seam allowance built in, so keep that in mind.
Next, square the pattern piece to the cutting mat, matching the top mark with the angled line. Draw the angled line. If you don’t have a cutting mat or any angled lines on your cutting mat, you can also figure out the angle using a protractor and ruler or simply eyeballing it.

Turn the pattern piece and match the line to any vertical line on your cutting mat. I want my chevron pieces to be finished at 2 ½” so I measure over 2 ½” and draw a line. **Note: we will be adding seam allowance at a later step.** Continue drawing lines 2 ½” apart on both sides of the original line.


Measure and draw a ½” seam allowance line at the top of the pattern piece. The top has a slight curve on one side so make sure to measure and follow the curve. Then, starting at the top, number each section and cut on the angled lines, so each section becomes a separate piece.

Next, grab more blank paper and measure out 3 ½” strips. These will become the new pattern pieces with seam allowance added. Be sure that the strips are wide enough to accommodate each of the numbered pieces. The amount of strips needed depends on the size and length of the skirt you are making. My paper is 24” wide, so I will be able to get a few pieces on some of the strips.

Once you have your 3 ½” strips drawn, add ½” seam allowance lines on each side. This will give you a guide as to where to place the numbered pieces we made in the previous steps.

Cut on each center line. You will end up with 3 ½” strips, each with top and bottom seam allowance lines.

Set aside the strips and any pieces that do not share the top line of the original pattern piece. In my case, that would be pieces 3-8. Starting with a piece of blank paper that has a straight edge, draw a ½” seam allowance line.

Place one of your leftover pattern pieces on that line and then trace it. Pictured below is piece #2 but you will repeat this method for both pieces.

Now draw a ½” seam allowance on the top, and extend the other lines into the seam allowance. **NOTE: You will not need to add seam allowance to the top of piece #1 as the seam allowance is already built in and drawn.**

Cut out your pattern piece, number and add grainlines. The grainline will be drawn parallel to the sides on all pieces. Repeat for the other piece.

Now, grab your remaining numbered pieces and your strips. Place the numbered piece on the strip, lining up the top and bottom with the seam allowance lines. Trace, extending the lines into the seam allowance. I like to use my ruler as all of the pieces have straight lines.

Number and add grainlines parallel to the side. Repeat for the remaining pieces.


Grab your tracing wheel if you have it and go over each of the seam allowance lines. This will create a perforation that will make it easier to fold the seam allowance away.

Fold on the seam allowance lines on each piece. You will notice that each piece has little tails. Trim all of the tails from each piece using the edges of pattern piece as a guide.

Next we are going to check our work. Keep the seam allowance folded under and line up all of your pieces in numerical order. They should fit together perfectly and end up exactly the same size as your original printed pattern piece with the exception of the vertical side, which will be a ½” wider.

Now, onto the back pieces. Take pieces 1, 2, and 3 with the diagonal seam allowance folded under. Gently tape them together so they stay in place.

Lay them directly on top of the original printed pattern piece, lining up the edges and top. Square up the shorter vertical edge with your cutting mat. Make sure the top edge is matched up with a cut line on the cutting mat. Draw a straight line over all three pattern pieces.

Separate the pattern pieces and fold on the lines you just drew. Next, trace the pieces on blank paper. Number and label them each “back”, and add grain lines. At this point, you can also label how many pieces you need to cut for each. Pieces 1-3, both front and back, will be “cut 1 mirrored set”. Pieces 4-8 will be used for both the front and back so they will be “cut 2 mirrored sets”. Also, I like to label each pattern piece with the fabric /color so I don’t get confused on which fabric to use with which pattern piece.
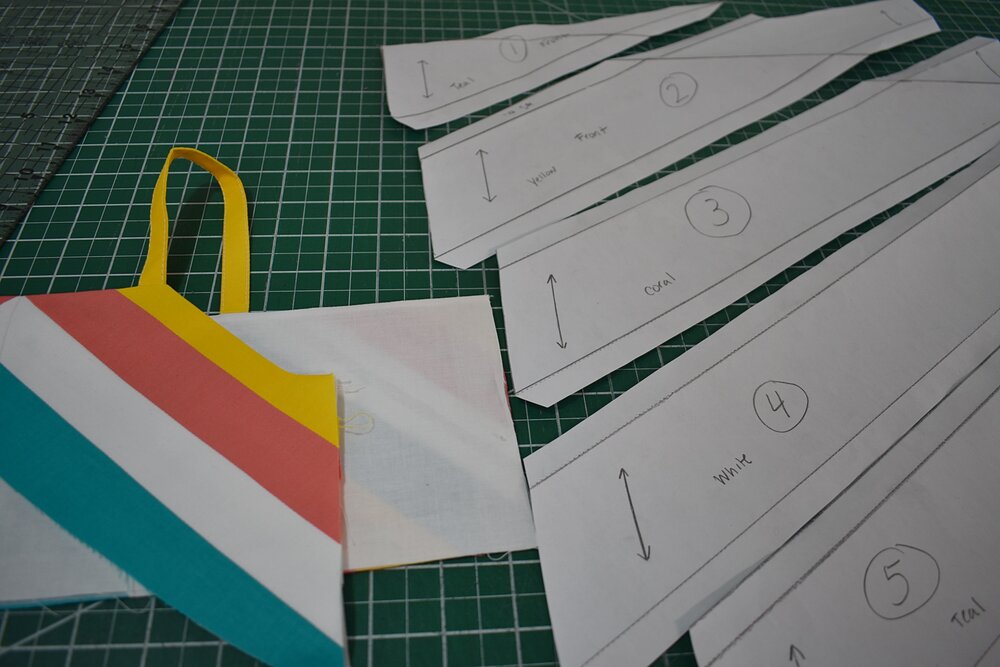
Woohoo! The pattern pieces are finally done! Are you still with me?? Now it is time to cut out your fabric! I will not be showing pictures of the cutting process but here is a picture of my final front pieces to give you an idea as to how it will look once cut. It is very important to follow the grainlines on your pattern pieces so you get the right drape on the skirt. Keep in mind that the pieces will be cut on the bias so handle them very carefully so you don’t inadvertently stretch them out.

Before I head to the machine, I like to stack my fabrics in order so I know which pieces get sewn together. I start from the bottom and stack one on top of the other. Make sure they are all facing the same direction so when you set them down you know which is the top. Another trick is to use different color pins and pin the corner of the pieces that get sewn together with the same color pin. So in the picture above you could pin the top corner of the white and the bottom corner of the coral with red pins and then the top corner of the coral and the bottom corner of the yellow with blue and so on. This way if you drop your pile, you still know which is sewn to which.
Off to the sewing machine! Start with the bottom two pieces. Lay them right sides together, matching up the ends while making sure the straight edge is aligned as well. At this point, pin or clip to hold in place. I am not a pinner, so I just begin sewing with a ½” seam allowance. Be sure to backstitch at the beginning and end.

Flip the bottom piece away, add the next piece and sew. Continue until all pieces are sewn together. Then, repeat for the other side of the skirt and the two sides of the back skirt.

Once all four skirt pieces are sewn together, finish the seams with your desired method, pinking shears, zigzag stitch or serge. I also finish the vertical seams on each piece as we will be pressing them open after they are sewn together.

Next, head to the ironing board. Press the seam allowance up on one side of the front skirt and down on the other side. Do the same on the back skirt pieces. Be sure to do the opposite of the front pieces. It is best to lay the already pressed front pieces right side up and then place the back pieces right sides down. Then check the sides of the front skirt pieces and press the back pieces the opposite direction.

Place the front skirt pieces right sides together on the long vertical edge. Nest each seam, pin, and sew with a ½” seam allowance. Repeat for the back skirt pieces. Press the center seam allowance open.


Congratulations! You are almost done. You can now continue with the tutorial on Page 34.


