Tutorial: Strappy Back Laguna Swim Top

Blogger: Jane Reuter
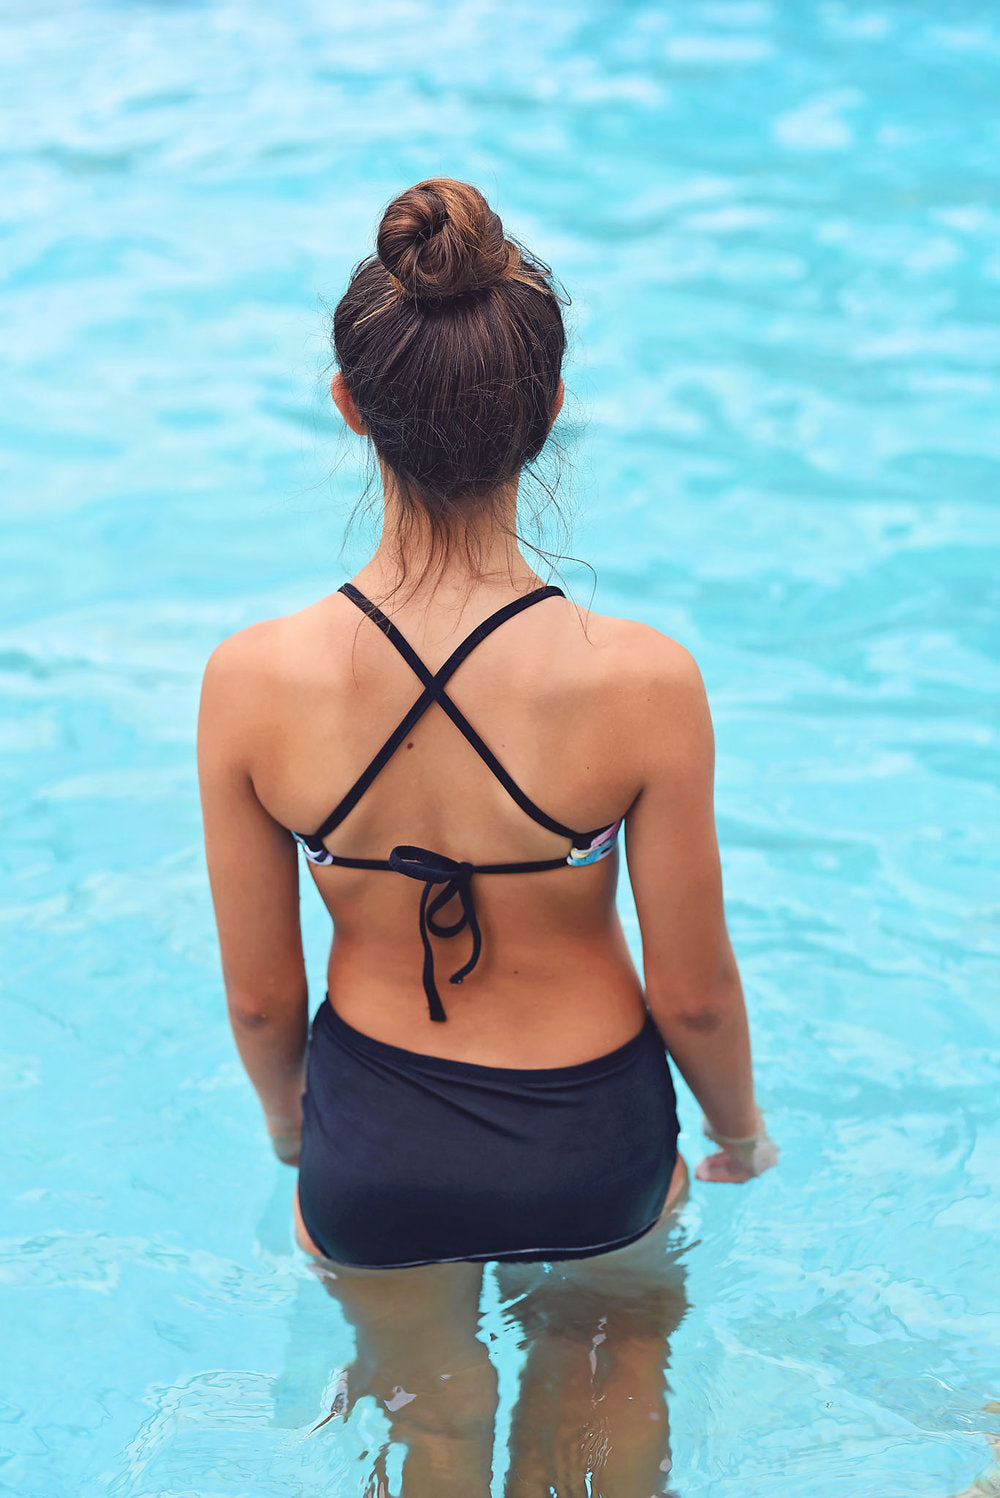
Strappy Back Laguna Swim Top
Strappy back swimsuit tops are all the rage this summer, so my daughter and I made a few simple modification to the Laguna swim top to create the same look. Surprisingly, it was rather simple.
To begin, print the Laguna “Binding” pattern piece for the front top only. Use the bikini cut line. Measure the child just under the chest to determine how big of a back opening is desired and how wide the front swim piece will need to be to wrap around the sides of the body. My daughter wanted hers to just come around the sides of her body and have a larger opening in the back, so we settled on a measurement of 21.5” total width for the entire bodice piece.
The front Laguna bodice piece will need width added to draw the extended width. Tape a piece of paper to the original front bodice piece to give some drawing room. Line up the bottom straight edges.

The pattern piece needs to become half of the measurement you came up with. For example, we wanted the bodice 21.5” wide, so the pattern piece needed to be 10.75” wide since it is cut on the fold. The size 14 front bodice piece was already 8” on the fold, so we simply measured 2.75” out from the edge of the bodice and made a mark. Draw a vertical line at this point. The height of this line will determine the height of the bodice edge. The top and bottom will lose 3/8” seam allowance when elastic is added later, so keep that in mind. Our vertical line was 2” tall.

Draw a curved, smooth line to connect the points. Please note that the tip of the original curve will be cut off. Cut out the new pattern piece.

If lining the suit cut a main and 1 lining. Baste the lining to the wrong side of the main. Follow the directions (starting on the bottom of page 31) in the original tutorial for adding the front center binding.

The binding for the side curves of the bodice will be done the same way as the tutorial, but the length will need to be adjusted. For size 14 years, we deducted 17” from the length of the circumference binding. However, in the original tutorial only 1 circumference binding is cut. For the strappy back version we will need 2. Same thing for the elastic. For size 14 years, we cut the binding and elastic 38”. Follow the instructions on page 35 through the top of page 36 to attach the elastic to the binding.

Attach the binding to the swimsuit as instructed in the Laguna tutorial. However, begin attaching the binding at the edge of the bodice.

When finished, it will look like this. Repeat on the other side.

Measure the bottom raw edge of the swimsuit. Cut a piece of 3/8” swim elastic 90 percent of the measurement. Slightly stretch the elastic across the wrong side of the bottom raw edge of the swim suit. Clip in place and sew to attach with a zig zag stitch.

Using the same technique in the tutorial, fold the elastic over one time, to the wrong side of the fabric. Clip in place. Sew to secure from main side of the suit using a zig zag stitch. Trim the edges of the suit at a slight angle. When the elastic is thread through the casings, this will give the bottom edge a slightly tighter pull to keep the suit fitted across the body.

Fold the short raw, side edges over 1/2”, keeping the newly cut angle. Sew to attach. Thread the straps through the back casings so they criss cross. Fold the raw ends of each strap back and tack them in place.

The Laguna strappy swim top is now ready to wear and is swim tested and approved!!