Tutorial: Rainbow Unicorn Malibu
Blogger: Rachel Iafigliola
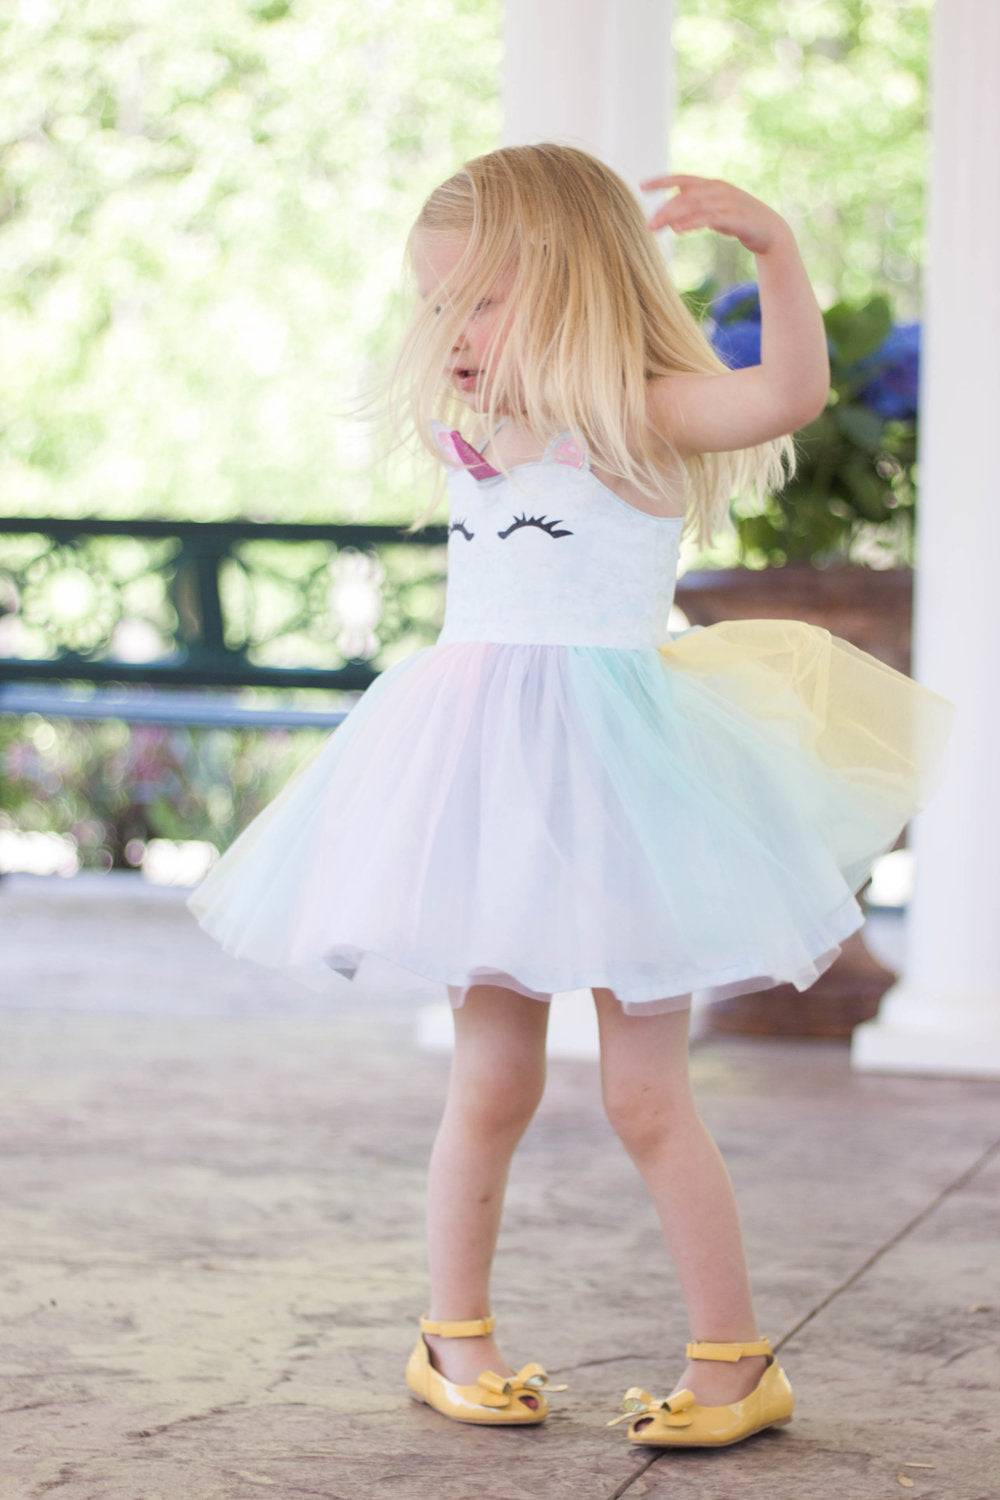
Rainbow Unicorn Malibu
Hi, It's Rachel and I am so excited to show you how to make your little girl’s unicorn wishes come true!

I modified the Malibu pattern to create the sweetest rainbow unicorn dress for my
littlest. This blog post will show you how to make one for your unicorn loving little ladies!!
First you will need the ears and eyes from the Animazing Unicorn Add-on. For the
eyes I purchased an Iron-On Transfer sheet from Joann Fabrics and carefully traced and cut out the eye lashes. Using a pressing cloth I ironed them right onto the front bodice piece of the Malibu centering them as best as I could.

I made the ears using the instructions in the Unicorn Animazing pattern. I also purchased a 2” unicorn horn from Pamper your Princess on Etsy to use for the dress. This little horn could also be handmade as well.

You will baste the unicorn facing down centered on the front bodice. Then you will baste the ears onto the bodice. I used the strap placement mark and centered my ears at that location. If you want your ears to stick straight up you need to angle them as shown due to the curve of the bodice.

Now follow the Malibu pattern to place the straps, back tie/bow, and elastic casing. When you sew the lining to the main bodice and get to the unicorn horn, instead of following the curve of the bodice you will sew straight across the unicorn. Finish the bodice according to the Malibu pattern and now you have a sweet unicorn face on the bodice of your dress!

Now to create the skirt. This may seem complicated, but I will do my best to explain. I used a soft nylon chiffon tulle to create the multi colored skirt. You can also use regular tulle. My skirt included two layers of multi colored tulle, one layer of white tulle for fullness and a lining layer. To create the multi colored skirt I pieced the skirt using five different colors of tulle. I wanted each color on the front and back of the skirt so I used 10 pieces for each skirt layer.
To figure out the size of each piece of tulle you will add 8-10” to the width of the skirt pieces listed in the pattern. Divide that number by the number of tulle colors you are using for your skirt. Then you will add 1" to that width to account for the seam allowance. I did the size 2 width skirt with 5 tulle colors so here is my math:
36 + 10 = 46/5 = 9.2 + 1 = 10.2
So using this math I cut my skirt pieces at 10” width rounding down slightly. To figure out the length of each of the pieces I used the length in the pattern but since I do not need to hem the tulle I took off 1/2" from the listed length. So each of my tulle pieces were 11.5" x 10". After cutting the desired amount of tulle pieces (in my case 10 for each skirt layer), l laid them right sides together and sewed. Continue until all of your pieces are sewed together, then sew the first and last piece together to create a large loop.

After creating both of my multi colored layers I pinned them together at the top of the skirt and sewed 2 lines of gathering stitches at 1/4" and 3/8" through both layers.

Gather the multi colored skirt to the width of the bodice and these will be attached to the bodice first.

Optionally you can gather and attach any additional tulle layers for fullness. Finally you will gather and attach your lining layer. One last note, for my lining layer I took off about 1/2" from the length of the skit pieces used in the pattern so that the tulle layers would be slightly longer than the lining.
I can’t wait to see your beautiful unicorn creations!! These are a few of my favorite photos of my little one in her unicorn dress!