Tutorial: Reversible Laramie Top & Charleston Shorts

Blogger: Annie Lomeli
Reversible Laramie and Charleston
Summer sewing is in full force in my sewing room. I wanted to maximize my efforts so I decided to make both the Charleston shorts and the new Laramie top reversible! In this tutorial, I will show you how to make 2 reversible sets from 8 different fabrics which will allow you to mix and match for 16 different looks. These sets are super quick to make. I spent more time deciding on fabric than I did actually sewing.
Choosing fabrics
Choose fabrics that share similar color schemes. They don’t necessarily have to be exact matches but should be in the same color families so they can blend well. You could also mix in a lightweight chambray or linen. Stripes and ginghams are always a great choice, as they work well with just about any print. The great thing about these patterns is they require very little fabric, so you can use up some of your larger scraps.
For my sets, I decided on 3 solids, 1 stripe, 1 gingham, 2 florals and 1 fun print. **NOTE: Be cautious of which prints you choose to sew together.** Try to use similar styles and colors together just in case the fabric is see through. I test my choices by placing them wrong sides together so you can see how they will look once sewn. If you can see the print from the pattern on the reverse side, you might want to choose different fabrics to pair together. Although, sometimes seeing the print through is not a bad thing. I chose to pair my black and white stripes with a light pink solid. You can see the stripes on the pink side but I really love the look.

Preparing the reversible Laramie top
We only need to make 2 small modifications to the pattern before we cut our fabric. First, take the front pattern piece and draw a line 1” from the fold line.
Next, fold the paper on the right side of the line under or cut it off and you have your new pattern piece.

Now, grab the back pattern piece and measure over 1 ¼” from the fold line and make a mark/notch. I am making a size on the smaller end of the size chart so you may want to adjust this to suit your needs. This will become a 2 ½” hole for turning the top in a later step. If you think that will be too small to turn, make your mark wider but I wouldn’t recommend any wider than 2” on the fold, which will become 4”.

Now it is time to cut our top fabric. I am making 2 tops, 1 button front (orange floral and solid white) and one regular (blue floral and mermaids). **NOTE: In this tutorial, I will be referring to both the orange and blue floral prints as the main and the solid white and mermaids as the lining.** Refer to the pattern pieces for cutting instructions.
Once all your pieces are cut, grab all your back fabric pieces and the back pattern piece and transfer the marking we made in the last step pictured above. You can either mark with a pen or use a notcher. The marks will be within the seam allowance, so they won’t be visible on the finished garment.


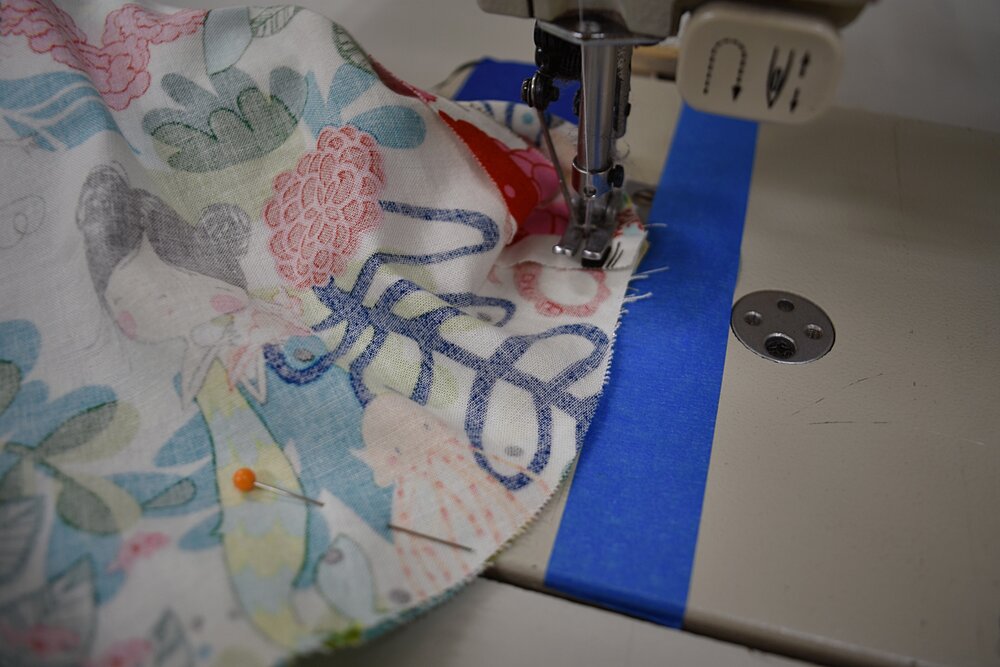
Next, head to the sewing machine with your back pieces. Sew a scant ½” seam allowance between the marks/notches only on each back piece. You will be sewing through 1 layer; do not stack them. This will be used as a pressing guide in a later step.

If making a button front top, apply a 1 ½” strip of lightweight interfacing to the center edge of each front piece.

Now, it is time to cut out the shorts. DO NOT cut out the waistband pieces yet; that will be done in a later step. We will be using the SIMPLE version of the Charleston shorts. Refer to the pattern pieces for cutting instructions. **NOTE: In this tutorial, I will be referring to both the black and white stripes and the solid light blue as the main and the green gingham and solid light pink as the lining.**

Sewing the Reversible Laramie top
First, prepare the straps. Refer to page 16 in the Laramie tutorial. Next, we will be working with the back pieces only. Align the raw edge of the straps with the top raw edge of the back bodice main. Baste the straps in place with a 1/4” seam allowance.

With right sides together, align the back main and the back lining at the top and armscye. Pin or clip to hold in place if desired. Sew with a ½” seam allowance. Do not sew down the sides or bottom. Trim the seam allowance and turn right side out. With right sides together, align and baste the straps to the front main piece or pieces depending on which style you are making.

With right sides together, align the front main and the and front lining at the top and armscye. Pin or clip to hold in place if desired. Sew with a ½” seam allowance. Do not sew down the sides or bottom. Trim the seam allowance and turn right side out. If making the button front option, repeat for the other side. Press both the front and back bodice. Try to get the fabric as even as possible when pressing. Lay the front bodice on top of the back bodice. Make sure the straps are not twisted.

Separate the main from the lining on both the front and back pieces. Align the edges and pin or clip to hold them in place.

Sew both side seams with a ½” seam allowance. If making the button front option, pin and sew the front center seams with a ½” seam allowance as well.

Turn right side out and press the side seam allowances open.

Now we will be finishing the hemline on the button front option. There will be separate instructions for the regular version in later steps.
Separate the lining and the main and turn inside out. Match up and pin the side seams and the marks/notches at the center back. Start sewing at the center front seam with a ½” seam allowance. Continue sewing until you reach the pin at the first notch. Backstitch. Start sewing again at the next notch and continue sewing until you reach the end.

Trim the seam allowance across the whole bottom with the exception of the opening. Pull the top through the opening and press the bottom seam. Your stitch lines will work as a guide for pressing the opening. Edgestitch/topstitch to enclose the opening. You can do just the opening, just the bottom or sew around the whole top. If you prefer no visible seams, hand stitch with a ladder stitch. The choice is yours!

Finishing the hemline on the regular version is a bit more tricky. Pay close attention to the following steps. Once you wrap your head around the method it will be easy peasy.
Start with the top lying flat on the table. Separate the front main from the top.

Take the front lining only and pull it away, turning inside out and up folding the other layers inside. Match up the front main and the front lining.

When you open up the 2 layers, this is what you should see at the side seams.

Push the back main and lining away, match up the side seams and pin to hold in place. Repeat for the other side.


At this point you can pin the whole bottom front to hold it in place if you desire. Start sewing at the side seam with a ½” seam allowance. Continue sewing until you reach the other side seam.

Trim the seam allowance and turn the top right side out. The front bottom will be sewn and the back bottom will not.

Now, separate the back main from the back lining and turn inside out. Match up your marks/notches on the center back. Pin to hold in place.

Start sewing with a ½” seam allowance at the side seam. Continue sewing until the first notch. Backstitch. Start sewing again at the second notch and end at the other side seam. Make sure you don’t catch any of the front bodice in your seams. Trim the seam allowance.

Pull the top through the opening and press the bottom seam. Use your stitch lines as a guide to press the opening. Edgestitch/topstitch to close the opening. You can sew around the whole bottom, just the opening or hand stitch it closed if you prefer no visible seams.

Sewing the Reversible Charleston Shorts
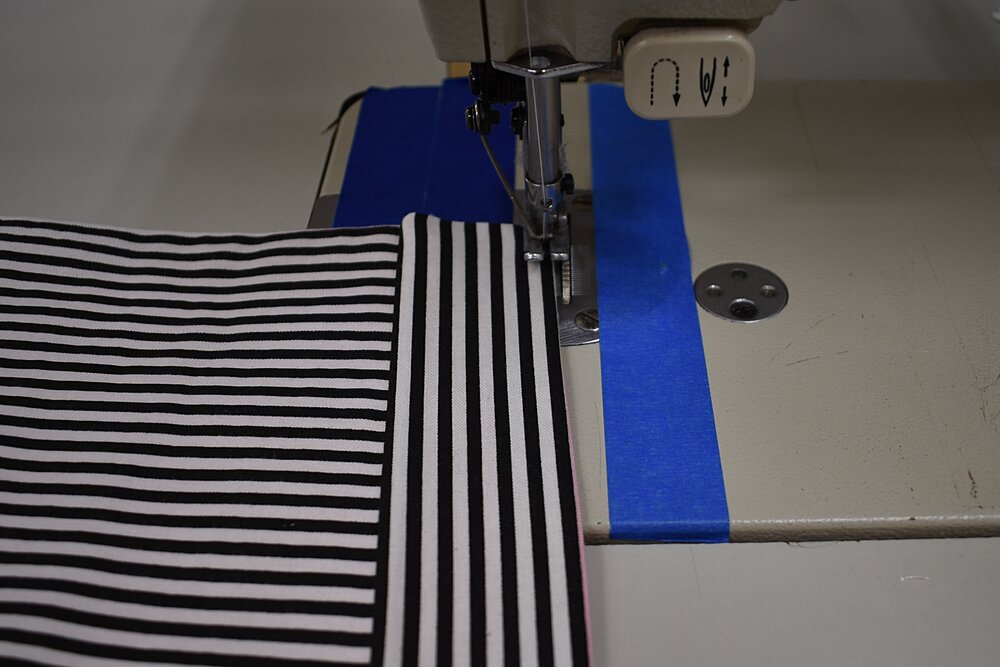
Now onto the shorts! Follow the instructions in the tutorial from page 41 through 48 for constructing the SIMPLE SHORTS. There will be one exception to this….SEW USING a ¼” SEAM ALLOWANCE rather than ½” on both the front and back side pieces only. If you need to, you can draw the seam allowance on the fabric with a wash away marker so you can make a smooth transition on the curved portion.

Now we need to figure out the dimensions for the waistbands. I decided to shorten my waistband to accommodate the 1 ¼” elastic I have on hand. So, my waistband height will be 2.5” rather than 3” like the Charleston tutorial. I am telling you this just in case you notice the difference in proportion in the next few steps.
Next measure the top edge of both the FRONT and BACK of the shorts and add 1” to your measurement. This will give you the total width you need to cut. Say your top front is 9” and your top back is 18.5”. You would add 1” to each of those measurements so your waistbands will be cut at 10” width x 3” length and 19.5” width x 3” length.

Cut your waistband pieces. You will need 1 lining and 1 main for the front and 1 lining and 1 main for the back.

Grab your waistband pieces and head to the ironing board. I am a huge fan of Lite EZ-Steam double sided tape. I use it pretty much daily. It is wonderful to use when enclosing the waist seam on your dress bodices and just all around fabulous for keeping any and all things in place without pins. This is not necessary to complete the shorts but it sure makes it a lot easier.

Start by adding the double sided tape approximately a ½” away from the top edge of the FRONT waistband main, starting and stopping approximately a ½” from the ends. Keep in mind, I am making 2 pairs of shorts so you will see 2 main waistbands below. It is pressure sensitive so just run your finger over it to adhere to the fabric. Use the edge as a guide to press a ½”. Next, stack your waistband lining on top and use the main waistband as a guide to press your ½” on the lining. If you do not have double sided tape, simply press a ½” on all pieces.

Repeat with the BACK waistbands. You will be adding double sided tape and pressing a ½” to the short ends as well. Try to make the corners as crisp as possible. Also, just in case you noticed the colored sides of my tape, I want to let you know that it does not come this way! My daughter thought it was a good idea to color one side of the roll with a marker. 😀

Head to the sewing machine. Start by placing your FRONT waistband pieces right sides together. Sew both short ends with a ½” seam allowance. Separate the lining and main and then sandwich the top front of the shorts between the waistband. Make sure the main is matched up to main and the lining is matched up to lining. Baste the shorts to the main waistband with a ¼” seam allowance. (You are more than welcome to just pin it all together and sew with a ½” seam allowance but I find this method more accurate in making sure the ends meet up perfectly.) Next, lay the lining down, aligning it with the top of the shorts. Sew with a ½” seam allowance. Trim the seam allowance on all 3 sides.

Grab your BACK waistband pieces. Line up the top of the shorts with the main waistband. Make sure the edges of the shorts line up with the pressed ½” at each end of the waistband. Baste shorts to waistband with a ¼” seam allowance. (sorry, I don’t have a picture of that step) Lay waistband lining on top, aligning the sides and top. Pin and sew with a ½” seam allowance. Trim the seam allowance and head to the ironing board.

Flip the front waistband up and away from the shorts. Press. Fold the ½” portions down and do a quick press just to reset the crease. Remove the tape liner and align the top edged of the waistband. Press to secure.

Flip the back waistband up and press. Fold in the short ends. I like to angle the ½” portion of the lining. Remove the tape lining from the top waistband only and align the top edges. Press to hold in place. The ends will remain open as we will need to run the elastic.

Edgestitch the top of each waistband.
Now it is time to run the elastic. I just use a safety pin. Thread the elastic through the waistband, pulling just until the edge of the elastic meets the edge of the waistband. Place a pin about 2” away from the edge just to hold the elastic in place. Flip up the pressed edge and nest the elastic underneath. Take off the tape lining and match up the edges.

Sew through the waistband, parallel to the opening, with a ½” seam allowance, securing the elastic. Edge stitch the opening. Repeat for the other side. Your back waistband should look like the picture below. The arrows are pointing to the seams on each end.

You are almost done! Now it is time for buttonholes and buttons. The sides of the Charleston shorts will overlap each other by ½” so your buttonholes and buttons should be placed at ¼” from the edge of the front and back sides. The Laramie top will overlap 1” so the buttonholes and buttons should be placed ½” from the center edges of the top. I will not be showing you how to sew the buttons and buttonholes. If you need assistance, check out this link.
The shorts and tops are reversible so they will need buttons on both sides. Unfortunately, the buttons will have to be sewn on by hand. Just be sure to leave enough space between the front and back buttons so you can easily button and unbutton. I like to use a toothpick as a spacer.

Congratulations! You are done! Now checkout all of the possible options to mix and match. I love this because my daughter can get dressed on her own and I don’t have to worry about whether or not the outfit she picks will match.
