Tutorial: Advanced Full Bust Adjustment
Blogger: Jenn Meitin Williams
Advanced Full Bust Adjustment
In a previous blog post, a simple method of tackling a full bust adjustment (FBA) was explained. That method is great for a quick and easy adjustment, especially if the adjustment needed is small. If the bust is on the larger end, this method is more accurate and will ultimately fit better! To determine if a full bust adjustment is needed, refer to this blog post: Full Bust Adjustment: Easy Method.
To start, we need to determine how much to add to the pattern. LLK patterns are drafted for a B cup (2-inch difference between upper and full bust). For every inch that your bust is over that 2” difference, an extra 1/2” bust width is needed. Let´s break that down.
We will use these measurements for this example:
Upper Bust 38.5”
Full Bust 43.25”
Difference 4.75”
There are already 2” accounted for in the pattern since it is drafted for a B cup. Meaning that a 38.5” upper bust is sized for a 40.5” full bust. Since our full bust is 43.25” we need to adjust for the difference.
43.25” - 40.5” = 2.75”
Another way to look at it is by subtracting 2” from the measured difference of 4.75”
4.75” - 2” = 2.75”
This amount is the total amount needed for the whole front bodice. However, we are only working with half of the pattern piece. Therefore we need to divide 2.75” in half, giving us 1.375”. That is our magic number!
Cut out the front bodice pattern piece and hold it up to your body to get the approximate location of the your apex (or nipple). Make a dot on the pattern piece at this location.
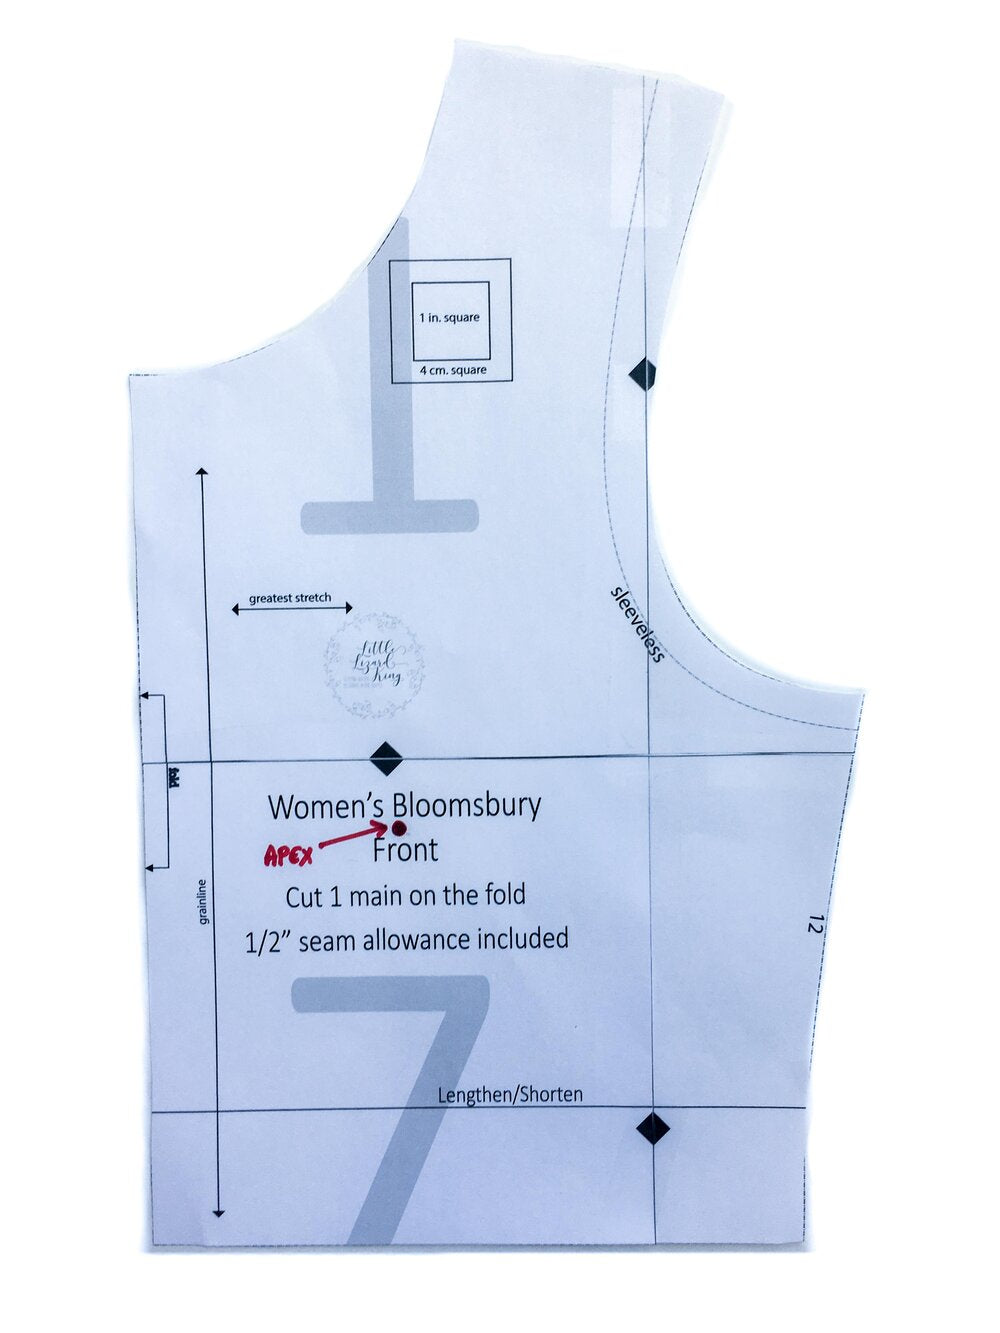
Now draw three lines as shown below. All three lines will start at the apex point that you drew. Draw line number one to the armscye approximately one-third of the way up from the side seam. Draw line number two straight across to the side seam perpendicular to the grainline. Draw line number three straight down to the bottom parallel to the grainline.

Cut along the lines as shown, leaving two pivot points: one at the seam allowance mark and one at the apex.

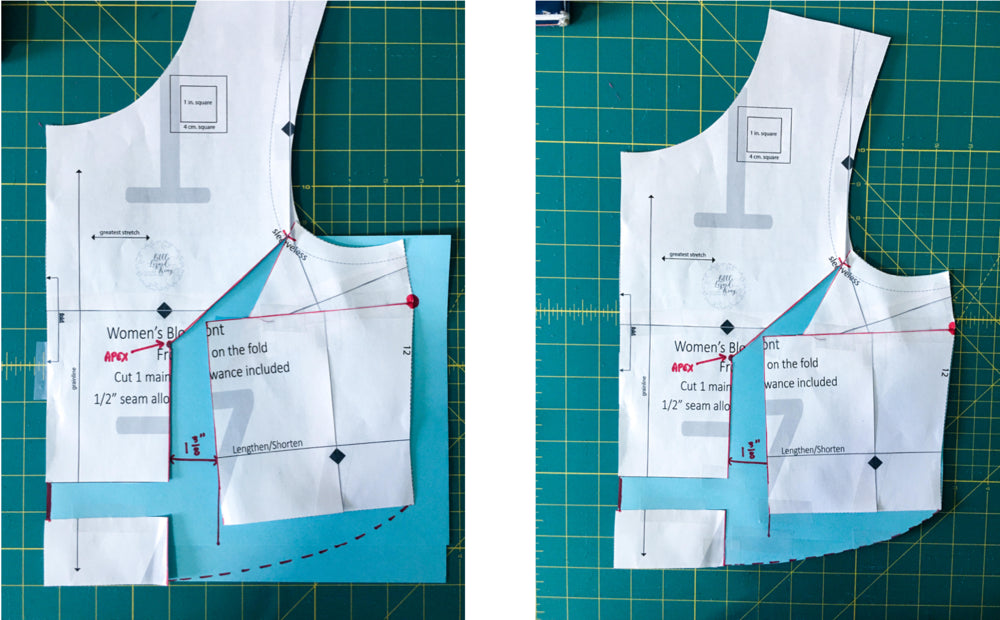
Tape the bottom of the bodice along a straight line on your cutting mat. Gently slide the bottom right corner of the bodice down and to the right to create a 1.375” gap (the number calculated above) between the two vertical lines. A “dart” like shape will naturally open at the side seam.

Slide a piece of paper under the bodice, (tape it down so it doesn’t shift) and draw a line along the right side for reference.

Now the left side of the bodice needs to be adjusted to match the new bottom hem of the right side. Cut along the lengthen/shorten line and slide that piece down to match the right side.

We are almost there! We don’t want to keep the dart so we are going to close it. Rotate the right bottom side up to close the dart and tape it shut. Make sure to keep the top right piece and the highlighted spot in the same location. Only rotate the bottom piece.

Cut along the yellow line, leaving a pivot point at the side seam.

Rotate the piece up to close the dart until the bottom left corner is aligned with the reference line drawn.

Now that the pieces are all in place, redraw the hem line and cut out the revised pattern piece. The revised hem line will be a gradual curve to meet back up with the side seam.
The next step is a personal preference. If you feel like you will need a touch more room at the waist, the above pattern piece is finished and can be used to complete the pattern. However, if you would like to keep the waist hem the same width as intended, you will need to blend the side seam back in. To do so, place the original paper pattern piece over the revised piece lining up the center fold and neckline. Make a mark where the original waist hem width hits the revised pattern piece.

Redraw a new side seam to blend back to the mark made above. Be sure to start at a point below the closed side seam dart so any needed width from the bust area is not removed. The finished pattern piece should look similar to the photo below!
