Tutorial: Astoria Suspender Shorts
Blogger: Christina Gossard
How to make Suspender Shorts using the Astoria Overalls Pattern
Hi! Today, I am sharing how I used one of my favorite patterns to create an outfit for my little boy to wear for Easter. Last year, I made him the reversible vest and double layer bowtie and he looked adorable! This year I wanted to make him suspender shorts, so I thought about what patterns I already had that I could modify to make what I had in mind and decided the Astoria Overalls would work perfectly.
Here’s how I did it:

Cutting:
When you have your pattern printed out and ready to go, follow the cutting instructions for everything except for the straps and the pinafore. Next, you will need to measure the pinafore pattern piece width across the top and length along the fold line. To determine the length that you will need to cut the straps, simply add the pinafore length measurement that you just got to the appropriate strap length found in the cutting chart in the tutorial.
ex. A 3t would be 6 3/8”(pinafore length) + 16”(strap length) = 22 3/8” (new strap length).The strap width will remain the same.

Now, use these measurements to cut 2 straps/suspenders. You will use the pinafore width measurement later.
Sewing:
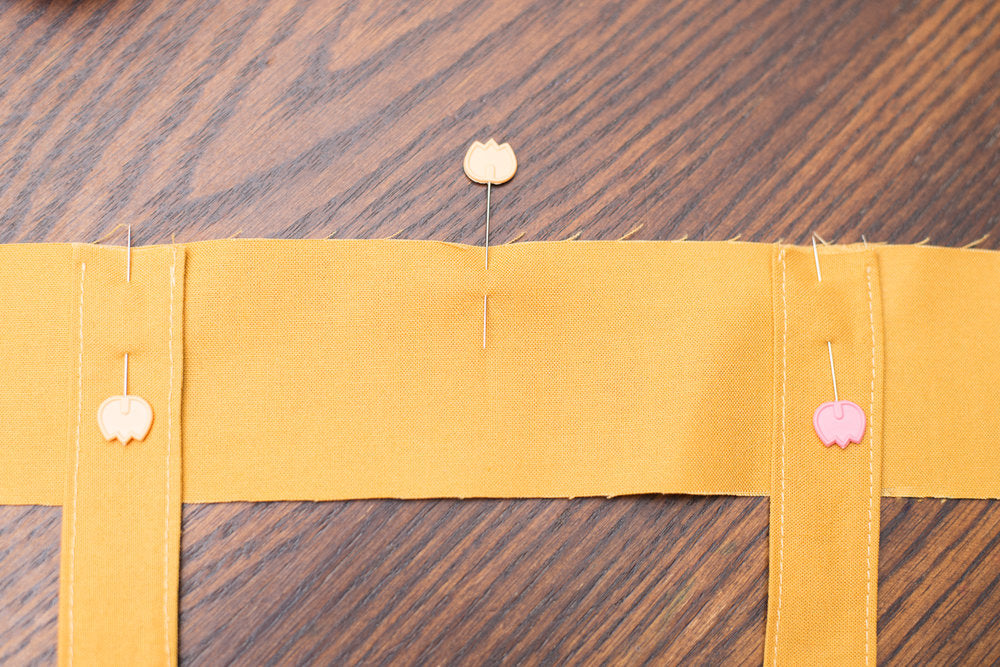
Follow the tutorial to create the straps (don’t forget to use a 1/4” seam allowance here). At this point you will be attaching the straps to the waistband front instead of the pinafore/bodice piece. To do this lay on of the waistband front pieces right side up, find the center and mark it with a pin.

Using the pinafore width measurement you found earlier, use a pin to mark where your straps will be placed on either side of the center pin. Now, center your straps where you placed the pins, aligning the top raw edges and baste them in place.

Place the waistband front lining piece on top of the front waistband, right sides together, pin and sew along the top edge only. The straps will be sandwiched in between the layers.

When you have finished this step, you will be able to continue following the original tutorial starting on page 14 to finish up sewing the shorts.

I chose the hemmed shorts option, but any of the other styles would be super cute as well. You could do this with the pants too! I hope you give this little modification a try and I can’t wait to see what you create!
Thanks for reading,
Christina


