Visions of Sugarplums, Darlington Style

Blogger: Megan McGrew
Visions of Sugarplums, Darlington Style
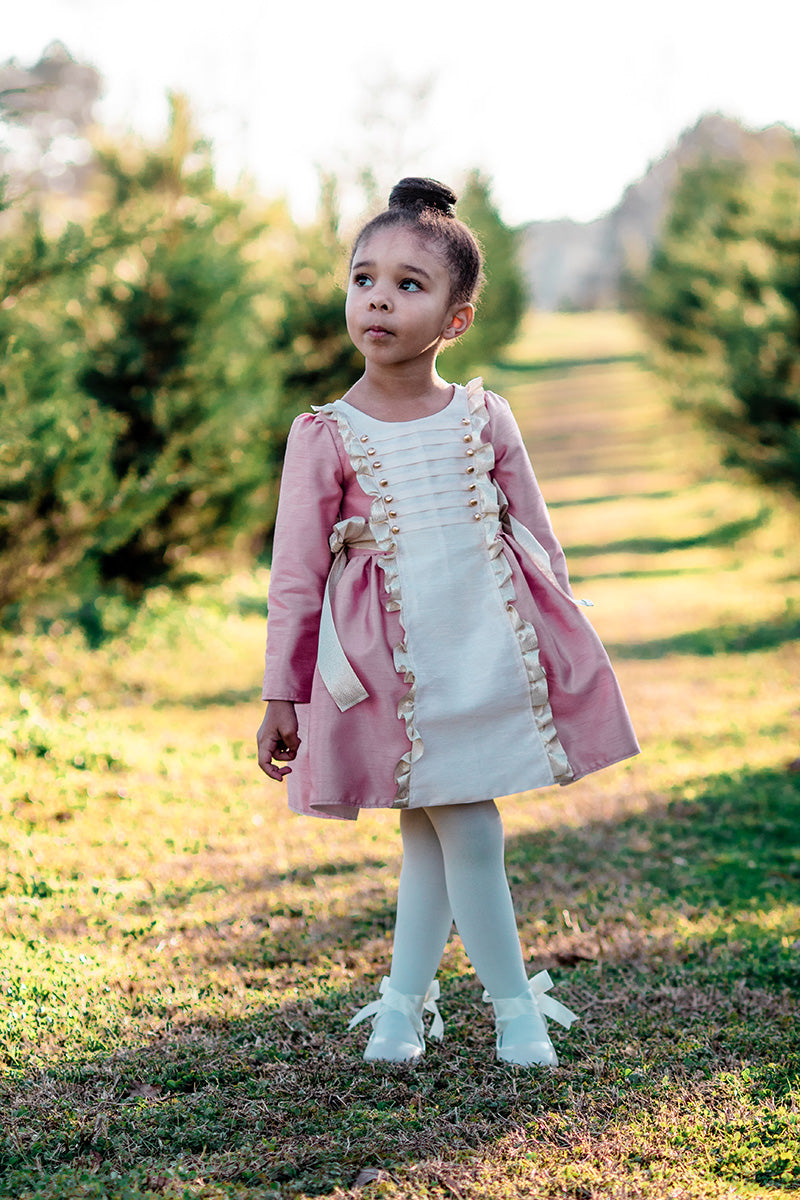
I can’t tell you how much I adore the Little Lizard King Darlington dress and romper patterns. After having the opportunity to sew both versions I knew the center panel was begging to have some fun detail added. I tossed around a few ideas and decided it would be the perfect space to add pintucks. While planning this modification, I also decided it would be an awesome Nutcracker themed dress using the pintucks as the horizontal bodice detail typically seen using gold/silver trim. Below I have provided a step-by-step guide so you can achieve this same look.
Adding Pintucks
LLK has a great video on creating pintucks.
To achieve this look with Darlington, cut a rectangle that is a couple inches wider than your FRONT CENTER PANEL pattern piece and approximately 4-6” longer than your FRONT CENTER PANEL pattern piece to accommodate the addition of pintucks. The length addition will vary depending on the size dress you are creating and how many pintucks you wish to add. I am creating a 2/3 blend with 7 pintucks.
I like to have plenty of room width and length wise for cutting out my pattern in a later step. I also like to make sure I have a perfectly symmetrical rectangle so that when I make the pintuck marks and start sewing the pintucks everything will line up correctly and I will have a nice straight finished rectangle for cutting my pattern piece at the end.

Using the FRONT CENTER PANEL pattern piece, measure from the neckline of your pattern piece down about 3/4" below the front neckline and make a mark on the pattern piece.

Use this as a guide for marking your first line on the rectangle for the pintucks. This will start the pintucks below the front neckline and still allow for your ½” seam allowance when constructing your dress/romper following the pattern tutorial. Next you will want to align the top shoulder of the pattern piece with the top edge of the rectangle, transfer the mark you made on the pattern piece that is ¾” below the neckline to the fabric. Be sure to use a marking device that will erase or wash out or keep the markings within the 1/4" seam allowance so it will not be visible once the garment is constructed.

Measure down another 3/4" and mark again. Continue measuring and marking along the side, every 3/4” until you reach the bottom or your desired spot for the last pintuck. Again, I added 7 pintucks for my desired look, but you can add as many or few as you want. Repeat the measurements and markings on the other side of the rectangle. After you have made all of your necessary marks you can draw a horizontal line connection each marking on the left to the right. I find this helpful for lining up my pintucks.

Fold the top of the panel piece towards the bottom (wrong sides together), aligning the first two marks. Press. Sew to create a pintuck with 3/8" seam allowance.

Open the panel back up, place the fabric right side up and press the pintuck towards the bottom of the panel. Turn the fabric wrong side up. Fold the panel again towards the bottom (wrong sides together) aligning the third and fourth marks. Press. Sew to create a second pintuck with 3/8" seam allowance. Continue folding, pressing, and sewing to create pintucks down the panel piece.

For the horizontal pintuck panel, fold the fabric in half. Make sure the pintucks are straight. Press. Place the FRONT CENTER PANEL pattern piece on top of the fabric and cut out the center bodice piece using the fold line and grainline marking on the pattern piece.

Baste the pintucks in the down direction at each side.

Proceed with the pattern tutorial to complete your Darlington dress.
*Photographed you will see the Little Lizard King Crown reduced to 65% and made into a bun crown.

