How To Use Kam Snaps

How To Use Kam Snaps
Kam Snaps are AMAZING!!! For those of you who do not like sewing buttons, this is a total game changer. The steps below walk you through how simple it is to add KAM snaps to anything...especially for those adorable rompers.
First, mark where you want to place your snaps on both the front and back romper snap panel so they would align correctly. I placed three marks on each panel.

Next, use the awl needle to poke a hole through your fabric at the places you just marked.

Next I'm going to insert the cap into the one of the holes just made. The important thing here is to think about what way your snap panel will close together to determine what size of the fabric your cap needs to be on. I wanted my cap on the inside of the front panel so I flipped the top panel up and inserted the cap so the prong came through from the back side.


Place a female socket on the prong with the widest side facing out.

Place the pliers around the snap set and squeeze the pliers. It's as simple as that and you are half way done!

Working with the back romper snap panel place the cap through from underneath so the prong faces up.
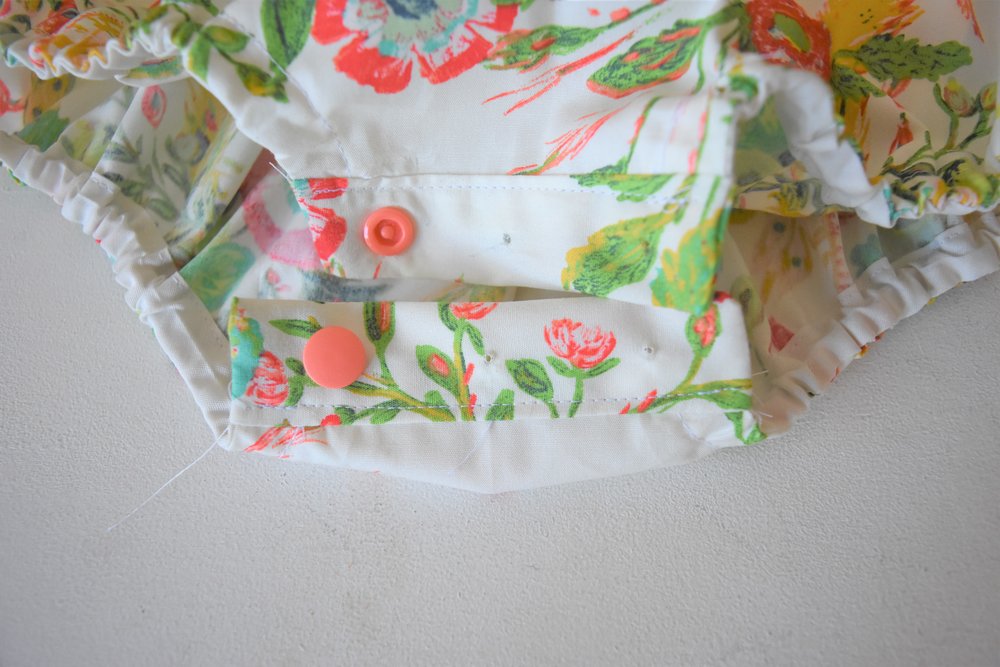
Place a stud on top of the prong and use the pliers to snap it together....just like you did with the first snap set.

Repeat these steps for the reaming holes on both the front and back snap panels and tada....you are finished!


I loved the KAM snaps so much that now I am thinking of things to make that I can use them on!!!! Have you seen the rivets, grommets, and table press? I can't wait to explore and learn more about what can be done with KAM snaps!!